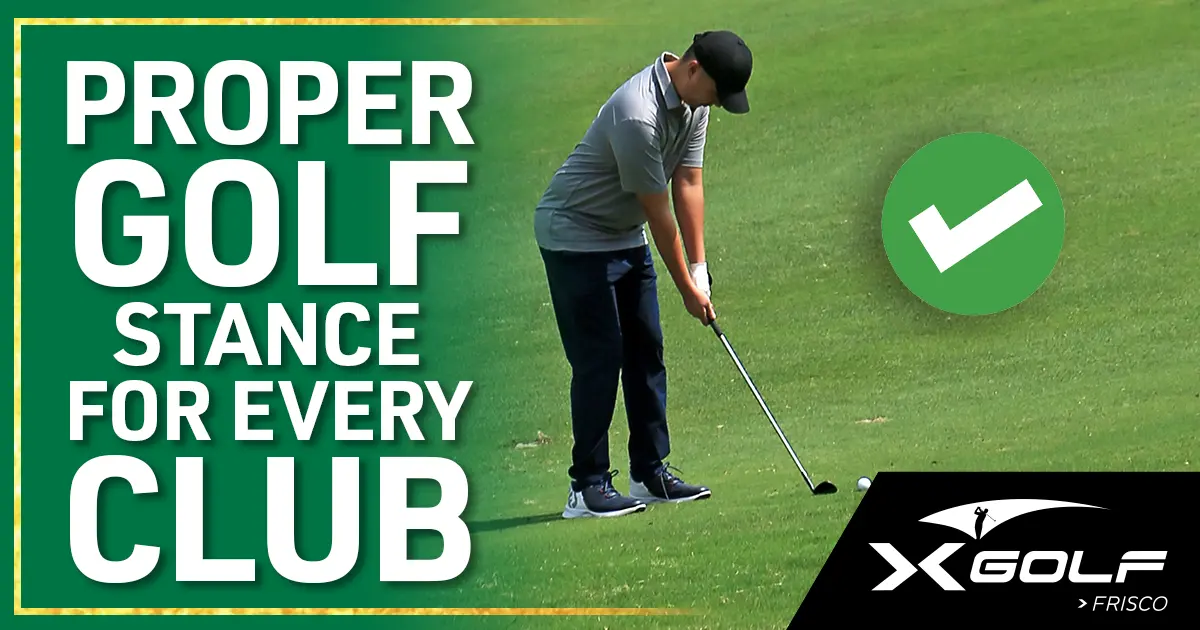
Six steps, done in the same order every time. Three of them change when you switch clubs, and the other three stay exactly where you left them.
Why your stance is different on every hole
Your golf stance is the one part of the swing you have total control over, and most casual players give that control away before the club ever moves.
Watch someone over 18 holes and you will see the setup rebuilt from scratch on nearly every shot: feet wider here, ball further forward there, weight hanging back because the last one was thin. Nobody writes any of it down, so nothing repeats.
So the miss keeps moving. You block a tee shot right, chunk the next wedge, top a 7-iron, then hunt for a swing fault that was never there. All you did was build three different starting positions in a row.
Run the same setup every time and you can change one thing and actually tell whether it helped.
Sort your hands out first. A setup routine cannot fix a grip that changes every swing, so if yours is a work in progress, read our guide to how to grip a golf club and come back.
Step 1: Build your posture before you look at the ball
Stand tall with your feet under your shoulders, push your hips back, and let your upper body tip forward from the hip joints. Your arms should hang straight down under your shoulders, so your hands sit below your chin without reaching for the ball or crowding it.
There is nothing to measure here. You judge it by how your arms hang. Adam Kolloff, a Jim McLean Master Instructor, uses that exact test: if you feel stretched toward the ball you are standing too far away, and if you feel cramped you are too close.
Add enough knee flex that you could hop, then leave your feet flat on the ground.
GOLF Top 100 Teacher Michael Hunt describes the feel you want as your shoulders tilting up and away from the ball rather than down at it. Bending from the waist does the opposite, dropping your shoulders toward the ball and rounding your back, so if your chin is on your chest, start again.
Step 2: Set your feet at shoulder width and flare the front one
Put your heels roughly shoulder width apart. That is the default for a mid iron, and it is where Kolloff starts every student before any club-specific change.
Then turn your lead foot out about 20 degrees toward the target and leave your back foot square to your toe line. Your lead foot is the one nearer the target, so a right-hander flares the left foot. The flare lets your hips clear on the way through.
Width goes wrong with a driver. Golfers spread out when they want distance, and past a point the extra width takes power away.
GOLF Top 100 Teacher Joe Hallett names the tipping point. Once your back foot sits outside your back shoulder, you overload your trail side, your weight hangs on your front foot through the swing, and the resulting reverse pivot (weight on the wrong foot at the top) sends one out to the right.
Hallett has you find your own number. Hit three drives with your heels closer together than your shoulders, three with your heels directly under them, and three wider than that, then keep the width that gave you the best contact.
Step 3: Anchor the ball under your lead chest
Set the ball opposite the inside edge of your lead chest, roughly under your front armpit. That is the anchor point for this routine.
Sean Foley, writing in Golf Digest, teaches ball position as a line from the lead shoulder joint straight down to the ground. Moving the ball for every club, he argues, turns solid contact into guesswork, so he changes stance width instead. Most teaching moves the ball across the bag, so take Foley as one school of thought.
Cameron McCormick, another GOLF Top 100 Teacher, measured it with alignment sticks on the ground. For a right-hander his lead foot sits 10 inches from the ball for a 4-iron, an 8-iron and a lob wedge alike, while the back foot travels from 12 inches down to 8.5.
Until your setup repeats, use the anchor. Step 6 covers which way the ball moves when the club changes.
Wedge drift is the failure to watch for. Players try to help the ball into the air, so it creeps forward over a few holes until the club bottoms out behind it and is already climbing at contact. If thin shots and tops sound familiar, read how to stop topping the ball in golf before you blame your swing.
Step 4: Split your weight evenly and keep it out of your heels
Settle your weight 50 percent on your front foot and 50 percent on your back foot, felt through the middle of each foot rather than the heels. Kolloff gives that same even split as the default, and Hunt lists balanced weight among the pieces of a neutral setup.
Even is the default because it keeps your chest over the ball. Sit back at address and your low point, the spot where the club brushes the ground, moves behind the ball before the backswing even starts.
The trap is the swing right after a bad one. A thin strike makes people lean away from the ball on the next shot, which guarantees another thin one, so reset to 50/50 and let the routine handle it.
Step 5: Aim the clubface first, then build your body around it
Stand behind the ball, pick a spot on the ground two or three feet ahead of it on your target line, and set the clubface square to that spot. The club gets aimed before your feet move, and your body then goes parallel to that line rather than pointing at it.
PGA Professional Brendon Elliott uses railroad tracks for this. The ball sits on the right rail and travels to the target, and your toes, knees, hips and shoulders all sit on the left rail, pointing slightly left of where the ball is going.
Almost nobody runs the step in that order. You walk in from the side, aim your feet at the flag, your shoulders open up to compensate, and you have built a pull-slice, a shot that starts left and bends right, into your address position. Frisco has the PGA of America’s headquarters a few minutes up the road, and it has not stopped a single person around here from aiming their feet at the pin.
Elliott’s second warning is about feel: your eyes sit inside the ball, so square never feels square. Pick the aim point from behind the ball, or have a playing partner stand down the line and call out where you are pointed.
Step 6: Change three things when you change clubs
Three dials move when the club changes: how wide your feet are, where your weight sits at address, and how far forward the ball is. Posture, arm hang and alignment carry over untouched.
Start from the mid iron, the reference point the other clubs move away from. Heels at shoulder width, weight even, ball just inside your front armpit. Get that repeatable and everything else is a small move in a known direction.
With a driver, take your widest setting from the Step 2 test and push your back foot away from the ball. Let your head settle behind the ball with your lead shoulder a touch high, and let the ball sit farthest forward, just inside your lead heel, where the wider base tilts you into the shot you want off a tee.
For wedges, narrow your feet, nudge your pressure slightly toward the target, and let the ball come back toward the middle of your stance. Not by much: short game specialist Parker McLachlin teaches roughly shoulder width for full wedges from 50 to 125 yards, with a little forward pressure at address. Shoving the ball back near your trail foot is a fake way to flight it low, and it costs you the strike.
A hybrid or a fairway wood sits between the driver and the mid iron, and a long iron behaves like a slightly wider mid iron. Turn the same three dials, just a smaller amount.
What a square, open or closed stance does to your ball flight
A square stance has your toe line parallel to your target line, and that is the stance these six steps build. An open stance points your toes left of the target, adds loft and sends the ball higher with left-to-right curve. A closed stance points them right of the target, takes loft off and moves the ball right to left.
Square is what you want for a normal full shot. Open and closed are one-swing choices, usually to bend a ball around a tree.
If your toes come out open on every shot without you deciding, you are back in Step 5 with a pull-slice built into your address position.
Which miss points at which setup step
Most misses trace back to one of the six steps, so work backwards from the shot to find it.
| The miss | Step to recheck | What has usually gone wrong |
|---|---|---|
| Starts left, bends right | Step 5 | Your feet are aimed at the flag instead of parallel left of it |
| Thin shots and tops | Step 3 | The ball has drifted forward of the lead chest anchor |
| Fat shots, ground before ball | Step 4 | Your weight sat back at address and moved your low point behind the ball |
| Blocked out to the right off the tee | Step 2 | Your back foot is outside your back shoulder |
| Rounded back, chin on your chest | Step 1 | You bent from the waist instead of the hip joints |
How to check your golf stance in a simulator bay
Take one change at a time into a bay: five shots with your old setup, five with the new. The number comes back on the very next ball, so you learn whether the change helped while you still remember what you did.
On a range you are reading a beaten-up ball against the sky, calling it “about 150,” and judging a stance change off a shot you could not really see.
At X-Golf Frisco, the screen returns ball speed, launch angle, carry, apex (the peak height of the shot), spin rate and side spin, which is the sideways spin that bends a ball left or right. You also get smash factor, which is ball speed divided by club head speed. Higher means a better strike.
Match the number to the step you changed:
- launch angle and carry tell you whether your ball position is working
- ball direction and side spin tell you whether your shoulders were parallel left or only felt that way
- smash factor tells you whether a width change improved your contact
At X-Golf Frisco, four lasers and a high-speed camera read every shot, so smash factor climbs when your strike gets better. Keep whichever setting ran higher across the five.
X-Golf reports 98% shot prediction accuracy from that system. The auto-tee also holds your tee height in your player profile, so your stance stays the only thing changing between shots.
X-Golf Frisco has 10 bays, and weekday mornings are the quiet window for unhurried setup work.
For a coach watching over your shoulder, book a golf lesson at X-Golf Frisco with a PGA pro. Track the same club and the same numbers every visit.
Run your new routine in a bay this week
Grab a couple of buddies, put an hour on the books at X-Golf Frisco, and spend the first 20 minutes running the six steps before anyone keeps score. Then pick one of the more than 50 courses and let the trash talk start. Once the routine holds up with something on the line, join a golf league at X-Golf Frisco and run it week after week.
Food and drinks show up at your bay, so the golf stance homework goes down easier than it does on a range mat in a Frisco August.
Frequently asked questions
How long does it take before a new golf stance feels normal?
A new golf stance takes three or four sessions to stop feeling deliberate. The first run through the six steps is slow, because you are checking things you used to skip. Most players stop thinking about posture and width after 150 to 200 balls, and alignment is the last one to go automatic. It helps to run them in the same order every time.
What should I work on once my setup is repeatable?
Start measuring contact instead of guessing at it. With your stance the same every swing, track one number per club, usually carry distance for irons and side spin for the driver. Five shots per club gives you a baseline you can compare against next month, and that is the point where practice starts changing your scores.